The Shoestring Guide - Ultralight backpacking on an ultra-lean budget
- Category Weight
-
THE BIG FOUR ($425)
4.88 lb
-
UTILITY ($85)
1.62 lb
-
CLOTHING (from your closet)
5.03 lb
-
ISO FUEL COOK KIT ($25)
0.79 lb
-
FOOD
2 lb
-
WATER ($6)
4.41 lb
-
EMERGENCY & HYGIENE
0.3 lb
The list is after the guide, scroll to the bottom for the list.
First published April 2016
Last updated Dec 2023
⠀
The Shoestring Guide
This is a guide and 3-season list of affordable and ultralight (UL) backpacking items that are held in good favor of the /r/Ultralight community, that being said, this list is entirely curated by myself and contains a significant portion of my own personally generated content. A lot of the reason for creating this list was to reduce the startup cost for my friends and coworkers looking to lighten their load and get outdoors. The primary portion of this list is comprised of items which are affordable, lightweight, and of good quality. Ideally, this can all be done on a shoestring budget of around $500.
Ultralight is as much a mindset as it is an active market. There are many DIY methods to go ultralight for even less money than what this list provides, but those items are generally a better fit for well-seasoned backpackers who know exactly what they want and how to go about doing it. That's not what this list is about. While you may find one or two relatively simple DIY items, this list is more about finding affordable off-the-shelf items that are of good quality. No, I am not the first to make a list of this variety, but I do feel that this list is one of the most comprehensive lists you'll find of the sort. This is a living and breathing resource, so what you see here is hopefully up-to-date with the latest industry info available. If you have any comments or suggestions then feel free to reach out to me, my contact form can be found here.
I hope this guide makes your introduction to backpacking a bit less cumbersome. Most importantly, I hope this enables you to get outside and experience the wonderful world you've always wished you could see.
⠀
DISCIPLINE
One of the biggest hurdles for beginner backpackers is the thought of carrying a heavy load of gear for many miles over grueling terrain, just to camp somewhere in the backcountry. The amount of effort required seems substantial, especially when considering that many car camping spots are phenomenally beautiful in their own right. After all, if you have a great time at camp but are miserable while lugging a pack for the greater part of a day, then is it really worth it? It's a fair question and deserves a response that isn't crafted by a machismo drive to carry heavy things. And the truth is, carrying excessively heavy loads is a fairly amateurish approach to backpacking. Nearly every AT or PCT thru-hiker you ever meet will tell you they ended with a lighter pack than when they started. It's not some new trend, either. Let's step back a few feet, and look at the bigger picture - your entire experience outdoors.
Ultralight is about carrying as much as you need to get fulfillment from all parts of your outdoor experience. While that sentence can be interpreted in two entirely different ways, an emphasis should be placed on the word "need" and how it isn't the word "want". Ultralight is a minimalist perspective on backpacking and about ridding yourself of excess material items in order to experience more of what you actually went out there to see. A good way to look at this is to think of wants as being camp luxuries that will unnecessarily make the hiking portion of your journey more burdensome.
Many times, people pack for the destination without much consideration of the journey.
This guide will help you pack for the journey.
⠀
THE BIG THREE
(and four)
I would strongly advise you don't skimp on the Big 3 Items: Bag, Tent, Pack - in that order.
BAG or QUILT provides you with warmth. This is the most important as it will keep you away from hypothermia. Hypothermia becomes a factor at temperatures as high as 50F (10C) in dry weather, and even warmer (60-70F) if it's wet or humid. Don't try to 'tough it out'; a poor nights sleep will lead to a poor hike and a poor overall experience. Absolutely DO NOT rely on a campfire for warmth. There are many cases when campfires are not possible and/or prohibited by your local service. Additionally, you can't tend to a fire while you're sleeping.
Quilts are a growing trend in the backpacking world, because it removes excess fabric and unused insulation making the bag lighter, cheaper, and more comfortable. This is done by removing most of the bottom insulation. Why do this? Well, when insulation is compressed, it cannot loft. Loft is required in down and synthetic fibers to provide insulation. As a result, any compressed insulation underneath you does not provide loft and cannot keep you warm. It's better to remove that section of the bag, make the bag less restrictive (more comfortable) and use your sleeping pad to provide insulation. What results is what is referred to as a "quilt". Unlike your quilt at home, most backpacking quilts use highly technical fabrics (like their sleeping bag counterparts) and high-end goose down to provide a lot of insulation at minimal weight. Additionally, backpacking quilts typically have a closed footbox, an open torso, and straps to latch onto your sleeping pad so that you don't slide off your pad in the middle of the night. Quilts are a fairly major innovation in the backpacking world and are starting to make their way into more mainstream manufacturers... but the cottage mfgs like HammockGear, Enlightened Equipment, and Katabatic Gear seem to already have it optimized. The HammockGear Burrow Econ on this list is the best-value quilt money can buy, period. This quilt has been on this list since its inception, and I have recently teamed up with the great people at HammockGear to get you an even better deal. If you use the discount code "MACON" at checkout, you will get an additional 10% off any of their quilt offerings. Their quilts are all handmade in the USA and this is quite a nice gesture for them to be offering my readers, so treat them well and support cottage businesses!
Synthetic insulation - If you are opposed to using down for religious or personal reasons, I would recommend looking into Synthetic quilts using Climashield APEX synthetic insulation, as it is some of the lightest synthetic insulation around (next to Patagonia Fullrange). Keep in mind that synthetic items don't compress nearly as well as their down counterparts (even the best synthetics are still 50-100% larger than 800fp down with the same temp rating), and you will definitely need a larger pack to accommodate it. In the past, synthetics have been recommended more for activities involving water, because they still retain some of their insulating properties even when soaking wet. Most down is treated these days to avoid this trouble, but in any case, you should protect your insulation from getting wet because it performs best when dry.
I have added an Enlightened Equipment (EE) Revelation APEX to the Alternative List for people looking for synthetic insulation. EE is one of the best in the business, and their 30F quilt weighs in at 24oz at a price of $185. If you swap this in for the HG Econ burrow, your kit will still be sub-10lbs and just a touch over $500.
TENT provides you with shelter. This should keep you and your bag dry on a wet night. Don't rely on your skills as a woodsman. Building your own shelter likely violates Leave No Trace (LNT) principles and in many cases will not be possible with what's available to you.
There are two primary categories of tents - freestanding and non-freestanding (guy-line). Freestanding tents are typically heavier, but easier to set up and hassle free. Non-freestanding (guy-line tents) are much lighter and typically provide for a much tighter pitch, which usually makes them better in adverse conditions. It used to be that all freestanding tents were double-walled and all non-freestanding tents were single walled, but now the market has changed dramatically and you can find single, hybrid, or double walled tents in either category. The tent on this list is a non-freestanding, hybrid walled (80% double, 20% single) tent which uses two trekking poles to pitch. This is one of my favorite tent designs, and they offer it in three flavors using different materials for different price points. I would recommend adding Lineloc 3 adjusters to each of the staking points and adding reflective spectra line to make staking and tensioning the tent even easier, though it's not necessary.
PACK provides you the ability to comfortably carry your gear. The reason this comes third is because a poor quality pack usually causes discomfort whereas a poor quality bag or tent can cause a case of actual distress. There are multiple ways to get fitted for a pack in person and many guides online. Buy your pack last. Make sure you can fit all of your gear inside. Make sure you can wear it comfortably with all of your gear. If it doesn't fit right, then don't buy it or return it.
There are lots of pack manufacturers out there at various sizes. What size pack do you need? Well, if you follow this list to a T, you probably shouldn't try to fit your gear in anything smaller than 35L. And that's getting toward the absolute lower-limit of what I'd recommend for someone acquainting themselves with UL gear. For a UL-minded beginner, I'd typically recommend something in the 45-50L range with some type of hipbelt and light-duty internal frame. Roll-top closures are preferred in my eyes, as they allow you to easily expand and contract your useable space without worrying about slop or slosh.
Packs are like footwear, they all fit people differently. With packs, you're going to have to spend some time to find one you like. It's a little bit of a 'choose your own adventure', but I've tried to make this as accommodating as possible. It's really difficult to find a pack at a distinct price point that fits everyone, as manufacturers regularly modify their packs to stay current with market trends. Currently, I have "Osprey Talon 44 OR Osprey Exos 38" listed as my pick, and I highly recommend both options from this manufacture as they're robust, relatively lightweight, and they offer a lifetime warranty. These packs are great options for beginners and might fit people a little differently, so it's worth exploring both of these options to see which it is that you prefer. You can usually find a good discount on these through one of the many retailers from which they're available. If you decide to go with something else, try to stay somewhere around 30oz and 40L. Other pack options include the classic Gossamer Gear G4 design, the Granite Gear Virga 2, and others that can be found on the "alternative options list" at the end of this guide.
"The Big Four"
The Big Three is sometimes seen as "The Big Four" to include a sleeping pad for cases whenever ground/soil temp drops below 60-65F and the pad becomes necessary insulation; a sleeping pad is included in this list for its insulation properties (R~2.5).
SLEEP PADS provide you with ground insulation. A cold ground will rob you of heat faster than you might expect. This is simply because the ground has a huge thermal mass relative to your body. As such, it's smart to sleep on an insulated pad to separate yourself from the cold ground. Sleeping pad insulation is measured in R-Value - to put it simply, the higher the R value, the greater the insulation. R 0-2 is for summer use (>50F), R 2-4 is ideal 3 season use (>30F), and R4+ is 4 season. It is possible for a pad to be too warm, so I generally try to carry a pad with a 2-4 rating, and if I winter camp I just bring an additional closed cell foam pad. R value is additive, so by stacking pads you will sum the R values.
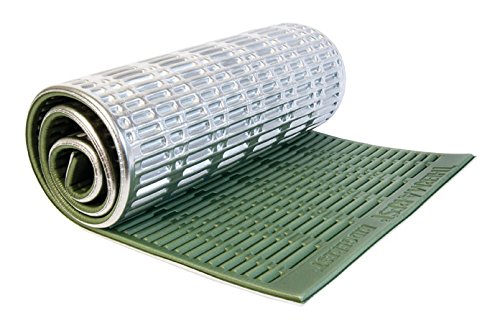
There are multiple sleeping pad styles, CCF (closed cell foam), inflatable, and self-inflating. I have yet to see an UL self-inflating pad with sufficient R value, so for the purposes of this let's focus on CCF vs. inflatable.
CCF = durable, lightweight, cheap, moderately warm (R 1.0 - 3.2)
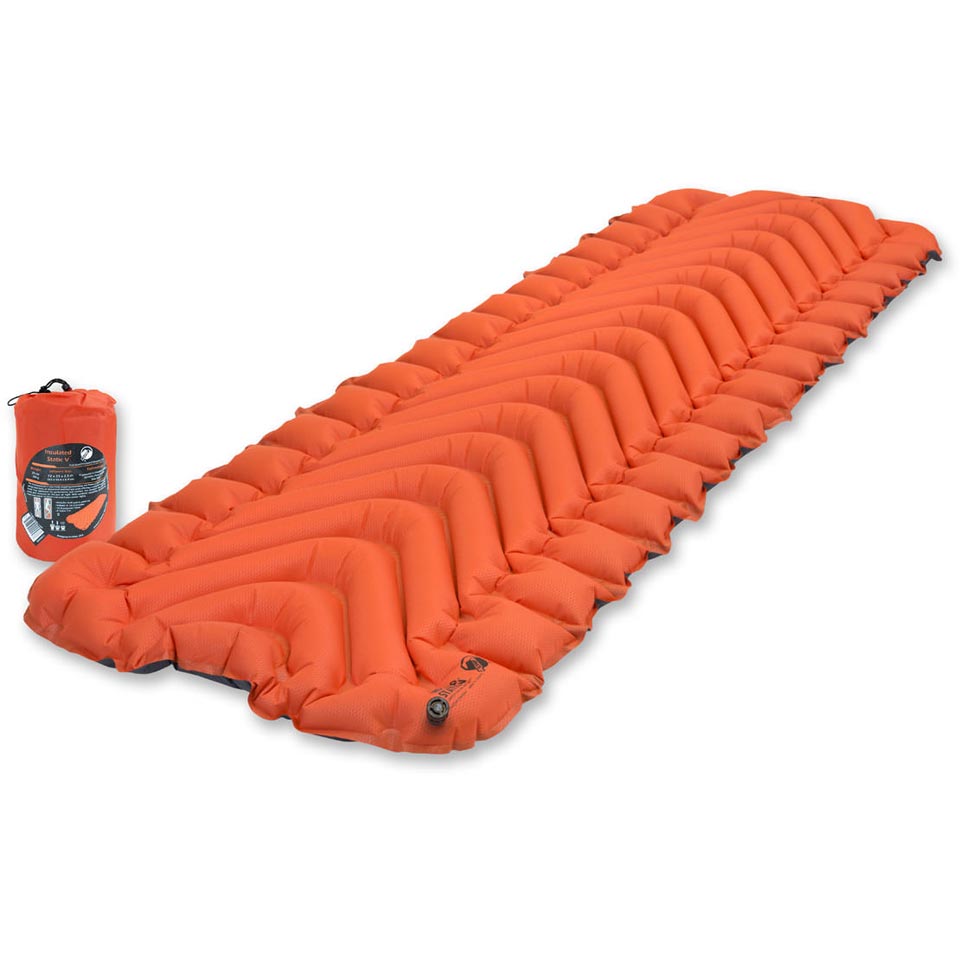
Insulated inflatable = lightweight, comfortable, warmer (R 1.0 - 6.0)
Some people will find the CCF to be too firm for use on hard surfaces, while others prefer the orthopedic feeling of lying on a firm surface after a long day - this is personal preference. Additionally, many people prefer to use small 3/4 length sleeping pads and rest their feet on top of their backpack for additional support under their feet, this also reduces foot swelling by elevating your feet a slight amount. If you aren't comfortable with this, it will cost a little more for a larger pad of the same design. I recommend practicing this at home before you decide to do this in the backcountry.
On this list, I have preferenced the CCF Therm-A-Rest ZLite SOL because it is a tried and true pad that will deliver exactly what it promises as a CCF pad. The small can also be cut/folded and placed in your pack for additional back support. If you want an insulated inflatable option, I would recommend checking out the Klymit or one of the other inflatable options on the Alternative List (link at the bottom of this guide). Klymit is a reputable brand and I even own one myself (but it's not my favorite pad), the other inflatable options are competitive options for their low price and are met with great Amazon reviews, but I would caution anyone on their use in colder weather. Lastly, a Therm-A-Rest RidgeRest will be a cheaper option than the ZLite SOL, but less versatile.
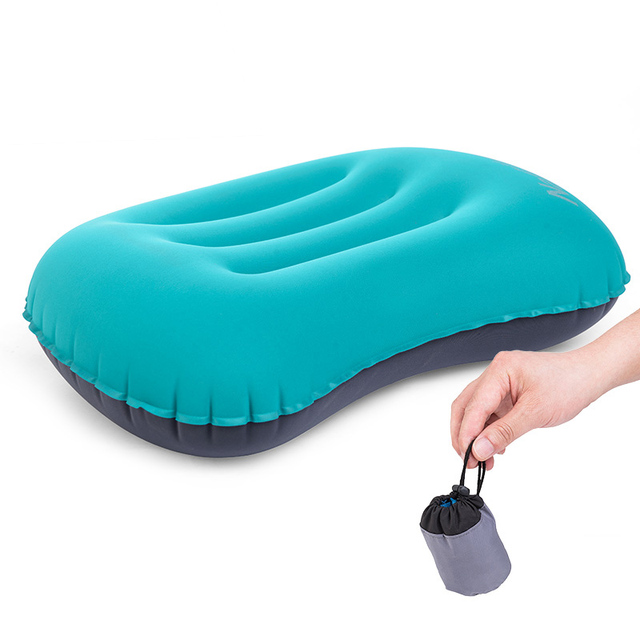
Pillow? - You can use your extra clothes and down jacket if you want. To keep it all from sliding around, slide a shirt over your sleeping pad and slip the clothes/pillow under the shirt. If you must take a dedicated pillow, I've added a lightweight Trekology pillow to this list (which is what I use). A good night of sleep goes a long way for a good hike, so this is one of those luxuries I can understand - you need to answer this question for yourself.
-
Since the typical Ultralight practice is to keep the Big Three below 5 lbs, the Big Four below 6 lbs, and the Baseweight below 10 lbs, here are the metrics for that:
- Shoestring Big 3 = 4.47 lbs
- Shoestring Big 4 = 5.10 lbs
- Shoestring BW = 9.02 lbs
⠀
CLOTHING
After The Big Four, clothing is typically the second heaviest part of a backpackers base weight. Be smart and pack what you really need! A lot of people become concerned with having a fresh set of clothing for every day they're on the trail, this is way too much! For a trip of any duration, be it a weekend or a 7 day trip, I only pack 1 of each item except for 2 pairs of underwear, 2 pairs of socks and 2 upper baselayers, swapping them before bedtime so that I am sleeping in "fresh" clothing. You probably don't need more than this, but if you're concerned, a good rinse of your dirty baselayers, once you've cooled down from the day's activities, will get nearly all the stench out.
A good clothing system follows the method of layering. In my experience, there's no such thing as a do-it-all jacket. Here's the layering system from inside-out.
1: Base layer: This is the layer closest to your skin. Its primary purpose is moisture management, and should wick sweat away from your body. Avoid cotton. Cotton is terrible at wicking moisture, has no insulation properties when wet, and can cause hypothermia in moderately chilly weather. More detail on that here.
1.5: Secondary Mid Layer: This layer only becomes common in colder winter months, when a fleece is used here in addition to an insulation layer. I have not included this layer in this list, as it is typically not packed.
2: Insulation / Mid Layer: This layer provides insulation and is where your down jacket comes in. On a cool night, you will usually only need your Base Layer and Insulation Layer.
3: Shell / Outer Layer: This layer typically provides wind and/or rain protection and no insulating properties. In some cases this layer provides extra tear resistance / protection, but that usually comes at the cost of weight.
I've composed this list to require minimal buying of new clothes. With exception to outerwear and socks, most of what's required for clothing is already at home! If you are looking for technical base layers and garments, I'd recommend looking toward Steep&Cheap and Sierra Trading Post. As for outerwear, here are the three items I recommend for purchase that are specifically on this list:
Down Jacket: Down insulation is the lightest insulation you can find - this list contains a down jacket that is affordable, of decent quality, and lightweight. If at any point you get a little chilly in this jacket because of wind, pair it with your rain jacket warm up the system a little more.
Synthetic Option - Once again, if you are avoiding down, there are synthetic options available, albeit much less clear-cut. I'd encourage you to look at Montbell as they have some great quality and affordable items available. The same spiel about synthetic insulation from the quilt section applies here as well.
Rain Shell: A rain jacket will go a long way at keeping you warm and dry on a rainy day. The one included in this list is fully waterproof, but is not considered "waterproof breathable." Just keep in mind that this rain jacket will get muggy, there's not much you can do to avoid this aside from maybe cutting holes in the armpit areas. With good planning a rain jacket is not frequently used, and the Frogg Toggs below is commonly carried by even the most seasoned ultralighters.
Hiking Socks: I am a big advocate of wool hiking socks. They are champs at wicking sweat and dry quickly when compared to cotton. I wear wool hiking socks even on the warmest days - they're much more comfortable than cotton and synthetic in my personal experience. On warm days your feet will sweat no matter what socks you wear. That said, another popular method is the RJ Dress Sock method. The way this works, you wear 3 cheap thin synthetic dress socks on each foot. At the end of each day, you rotate your socks so a different "fresh" sock is on the inside, middle, and outside. This provides adequate padding and blister control, and it seems to be pretty effective.
⠀
UTILITY ITEMS
A lot of these utility items need some clarification and additional detail to explain their purpose, so I'll go through those items one-by-one here.
Trekking Poles: Trekking poles make your hiking better. Plain and simple. They improve your posture, reduce fatigue, and make you feel like you can crush more miles. Don't believe me? Check out this study. Want more information? Read this article. Additionally, if you are using the tent I suggest below, you will need trekking poles to pitch the tent. Important Note: Avoid Square-Gaiting. Here is a video to explain proper trekking pole technique, and to avoid square-gaiting.
Y Stakes: Now, there are a lot of different stake varieties and brands out there, some good, some bad, but I'll help you cut through the crud and recommend this one - the MSR Mini Groundhog. The Groundhog and Mini Groundhog are both Y-stake designs that are quite versatile because they have considerably more surface area than a round peg of the same weight. Plain and simple, the Groundhog has been a do-it-all tent stake for a long time, and just recently MSR released the Mini Groundhog to appeal to the more ultralight mindset. They're made of 7075 Aluminum and are surprisingly rigid and resilient - I've never seen a broken one. There are a couple competing brands out there, so I'd recommend you watch this video to see what you're paying for with the MSR version as opposed to the knockoffs. Don't know how to stake-out your tent or hammock? Here's a good run-down, with particular emphasis on stake orientation. Lastly, here's perhaps my favorite guide when it comes to guy-lines, made by the one of the best, /u/AndrewSkurka.
Headlamp: Critical and underrated piece of equipment here. This will let you see when the sun goes down! A flashlight will also suffice, but why not get one that just sticks to your head? Boom. Handsfree light at night. Easy peasy.
Lighter: Bring a lighter with you. Sure you can use a firesteel or whatever if you like the work... but a lighter is easier. You're bringing a stove anyway, just bring a lighter too.
Pack Liner: There's a good chance you'll be in the woods one day when it rains, and you're gonna want to make sure your clothes and sleeping bag stay dry while your pack gets poured on. Get a waterproof pack liner like a fumigation bag (on the list below) or a trash compactor bag to keep those critical contents away from the water.
Storage Bags: Keep all of your good food in one bag, and your trash / used toilet paper in the other. Label them accordingly.
Knife: Okay, so a knife. As much as I love knives, this is a completely optional item. There are few cases when using a large Ka-Bar type knife will ever be a necessity, because you will be following LNT principles on established trails. That said, there may be a case where you need to cut some tape or cut a bag open or want to whittle a stick, in which case a small multitool will do the job just fine. The SAK is the bread and butter here - scissors for cutting fingernails, 1.5" blade for multiuse light-duty cutting, a screwdriver for easy trekking pole adjustments, tweezers for splinters, and a toothpick to get that damn beef jerky out from between your teeth. It's really the perfect UL multitool.
Trowel: Does a bear sh*t in the woods? Dunno, but a backpacker probably does. Like it or not, at some point you will poop in the woods. Lucky for you, you've thought ahead! So here's the scoop on trowels... the MSR Blizzard Stake and the Deuce of Spades are both dual purpose trowel/stake and are the best options in my opinion. The Deuce of Spades is lighter and more versatile. Coghlan's Lightweight Trowel also works, but I recommend shaving the handle and the shovel down a bit because it's almost a foot long and you don't need that much shovel to dig a poop hole. Pick your poison; for this list I went with the cheapest option, which is a shaved down Coghlan's trowel - $2 and approx 1oz. Make sure to dig your hole at least 6 inches in depth and pack out your waste items. Some toilet papers are fully biodegradable and some claim to be, but aren't. For the sake of staying true to LNT, pack out your TP in your waste storage bag, as mentioned above. I suggest using natural materials to wipe where you can, and finish off with the TP so you don't have to use very much.
⠀
COOK KIT
This is a pretty simple setup and many people are surprised by how small it really can be. You might be asking, “Why are these suggested but not required?” Well, that’s because some people prefer to forego the stove entirely by going “no-cook” and eating items that don’t require heating. For this list, I’m gonna assume you want a warm meal. Your cook kit comes down to three things: stove, fuel, and pot.
Pot: Let's start with the pot. You want a pot that is somewhere between 500-800mL in volume. This is pretty much the optimal range in pot size for 1-2 backpacking meals. Additionally, pots in this size range can usually store the entire mess kit inside. Another factor to consider other than size is material. Many high end pots are made of a thin titanium. This is because titanium doesn't conduct heat very well, meaning the handles and rim stay relatively cool while the bottom gets very hot - this makes it easy to handle and drink from immediately after cooking. Aluminum on the other hand is a strong conductor of heat, but much cheaper. If you're cooking from an aluminum pot, make sure to grip the pot with a bandana and be careful when sipping. The IMUSA pot I'm recommending is approximately 650mL in size and is made of aluminum.
Stove: The stove should operate no differently than a bunsen burner. There are various designs which make different efficiency and weight claims, but really, it's just a bunsen burner. Efficiency doesn’t really change much no matter the flame size you’re on; you just want to make sure the heat is being directed into the pot and not being dissipated elsewhere. I recommend the Monoprice Titanium stove or the BRS-3000T. The Monoprice is fully capable, weighs 48g, and is from a reliable American company. The BRS is a fully capable Chinese-made titanium stove that weighs only 25g. Lots of people remark on quality control issues with the BRS, but those issues usually become evident during the first test run of the stove. So make sure you test your stove before your first trip (and your other gear too). If your BRS stove doesn't work, simply return it and get another one that does. Personally, I replaced my old MSR Pocket Rocket with the BRS and it works great.
Fuel: The fuel in this case is a pressurized isobutane mixture (usually 80/20 isobutane/propane), sometimes referred to simply as "iso fuel." Note, this is not the same as propane, and comes in a different container. This is sold at virtually any outdoor store in most industrialized nations. If you’re going somewhere that might not have an REI or REI equivalent, I’d suggest a good multi-fuel stove like an MSR whisperlite international – but that is not UL and has no place on this list.
Windscreen and lid make your cooking game more efficient and are suggested, but not necessary. Long spoon is so you can eat your backpacking meal without getting your hands messy, but I guess it’s not required, either. No, you probably won't ever use a fork... or a spork... just get a spoon.
⠀
FOOD & WATER
Food: There are various food solutions for backpackers, many of them involve rehydration of some sort of foodstuff. The quickest, easiest and lowest-barrier options are Freeze Dried / Dehydrated meals. There are multiple brands that make these, and truth be told, they’re all pretty good. Obviously it's not gonna be as good as a well made meal at home, but you didn't go into the backcountry for the table service... right? Mountain House, Alpine Aire, and Backpacker's Pantry are all on-par with each other in terms of flavor – there are some good ones and some bad ones, but generally you will finish feeling pretty satisfied. Those brands are also all around $7-$10 per package and are linked in this list via Backcountry. Cottage brands such as Pack-It Gourmet tend to be higher quality, though sometimes a little pricier. There are other brands too, but the ones listed above are the brands I’m most familiar with. Feel free to explore other options.
The cheaper way to go about backcountry food is to find shelf-stable foodstuff that you like just as much, if not more. I gotta say that /u/AndrewSkurka is one of the better resources when it comes to a comprehensive guide to food, so I’m gonna plug his website here. Additionally, he also has a list of various backcountry recipes that will help keep your palate fresh.
Water Treatment: Let’s start off by saying there are 3 main contaminant types you have to be wary of in the backcountry: bacteria, protozoa, and viruses. Here’s the comprehensive CDC guide on backcountry water treatment. Cryptosporidium and Giardia are the most talked about trip-ruiners and both are protozoa; they both have similar symptoms which can take up to two weeks to manifest themselves.
In the past I used iodine water treatment, Polar Pure to be exact, but have since moved to a Sawyer Mini Filter as it is a little more convenient to be able to drink water as soon as it's been processed, whereas most iodine water treatments require you to wait 30 mins or so before consuming. Regardless of what you choose, as long as you use a trail-proven method of treating water from a relatively clean source, you should be okay. Be smart. If the water doesn’t already look mostly clean before filtering it, try and avoid it. If it's silty, you will probably need to use your bandana as a pre-filter to get most of the grit out. And don't feel invincible, backcountry water treatment options won’t do anything to filter out chemicals or toxins... and no salt water. Lastly, remember to get your water from a moving source – if the source is relatively slow or stagnant, it makes it easy for bugs to deposit larvae and other organic matter you don’t want to consume. I always try to fill up at a point where fast moving water separates from a rock it is flowing over. A ‘mini-waterfall’, if you will.
Boiling water is a really good method, but don't rely on it except when you're preparing meals. You aren't going to want to break out your stove and boil water for 10 mins every time you need to refill your water bottle. Also, remember that when boiling you need to be at a rolling boil for 1 min @ sea level / 3 min @ 6500ft (interpolate from those numbers) in order to kill pathogens.
Water bottles: Forget the Nalgene. For whatever reason, the Nalgene has become ubiquitous for ‘outdoor water bottle’. Don't get me wrong, it’s a great general-use water bottle, hell, I love my Nalgene! But not for backpacking. The Nalgene weighs in at 6.2 oz with a capacity of 1L. You generally want to carry 2L of water capacity with you for most hikes, so this means with Nalgene you'd be carrying 12.4oz for a container to put your water in. In contrast, two 1L Smart Water bottles weigh in at 2.2oz… you just made your pack 10.2 oz lighter by switching away from a typical Nalgene! See how easy this is?
The same applies to CamelBaks, they weigh a lot for their purpose (2L Crux weighs 7oz, dry - older models can weigh twice this). They’re also generally carried inside the bag, which puts you at risk of getting your insulation/clothes wet in the event you spring a leak at the hose fitting... and they're a huge hassle to take out of your pack for a refill at a stream. If you absolutely must have a hose system, a much simpler and cheaper solution is a soft sided bottle (1.1oz) + a platypus accessory hose (2oz), invert the water bottle and carry it on the outside of your bag in the water bottle pouch. You just saved at least 4oz, $15, and reduced your risk by switching to a simpler external hose system.
⠀
MED KIT
I wanted to spend some time to talk about what specifically is in my med kit, so you can understand my thinking. I specifically look for pills in differing colors so I can easily identify them.
20 pills of Ibuprofen (250mg /pill = 5000mg), orange oval pill - NSAID. Pain reliever, fever reducer, reduced swelling.
10 pills of Tylenol (250mg / pill = 2500mg), red circular pill - Pain reliever that doesn't thin blood in case of injury (concussion, open wound). Also, In case I run out of IBP and need more pain relief (usually because of sharing).
15 pills of Benedryl (25mg / pill = 375mg), hot pink oval pill - Sleep aid, allergies, and stings!
10 chewable tabs of Pepto Bismol (bismuth, the wonder-element), light pink chewable circular tab - Antimicrobial. Helps cure stomach/GI issues
10 tablets of Imodium, light teal oval pill – this will prevent water loss if you have excessive diarrhea, but one should show preference to Pepto as it is antimicrobial. Imodium will make you hold on to whatever stomach bug you have for longer, so use it as a means to prevent dehydration.
Small tube of Lotrimin - Anti-fungal cream. No one wants to say they'll need it, until they need it. (s/o to u/Natural_Law for this suggestion)
Bandaids/blister stuff - Cuts, scrapes, blisters, etc.
Medical tape / finger tape - Compression for reduced swelling, also can come in handy with stabilizing a rolled ankle
Antibiotic ointment packets (2 or 3, really light) - Use these when you have cuts. Prevent infection.
Comes in at about 2oz and I've used it every single time I've been on the trail either for me, for someone else, or both.
⠀
Other Options
Some people wanted other options, so here are two more lists...
Alternative Options List
Shoestring Alternatives - The "Shoestring Alternatives" list might have other options that are less durable, more expensive and/or heavier, and are generally deemed to be less optimized in some respect. That being said, these items sometimes make for nice substitutes to the primary list if you're looking to save on weight and/or price, at the cost of quality and/or durability.
Hammock Shelter + Alcohol Stove Options
Hammocking with Shoestrings - I have made another list with a Hammock Shelter and Alcohol Stove style cook kit. These are frequently requested kit options that can usually be swapped out relatively quickly. Keep in mind:
Hammocks are typically heavier and less versatile than tents (requires trees to pitch), but many argue it's much more comfortable and worth the few extra grams. Shug Emery is a hardcore hammocker and swears by it ("wooo buddy!!"). That said, I personally camp in a tent. Different strokes!
Alcohol stoves are generally lighter than canister stoves, however, they are prohibited in many forests during heightened fire restrictions due to the fact that they are considered an "open flame," meaning it cannot be regulated by a valve. Canister stoves are also seen as more reliable, easier to use, and more efficient. All that being said, alcohol stoves weigh much less because they don't need a heavy pressurized canister to store the fuel, nor do they need metal fittings and valves to operate. What they lack in efficiency is made up for in package weight savings. In many cases, a full alcohol stove kit will weigh a fraction of a canister stove kit counterpart.
⠀
Prices
I used to have the prices of each item listed, however, there is such variance with price from retailers that it became difficult to keep current. Instead, I have decided to list approximate prices for each category as a whole. I try to keep the links fresh with the best priced item I can find from a major online retailer, but if you see a large price discrepancy between what belongs on the list below and the listed price of the item, it might be worth searching around a bit on your own. It could also merely be a byproduct of inflation I would recommend using a price aggregator to help you on your search. I'm only one person and I can only do so much.
⠀
Disclaimer and Disclosure
Disclaimer: Please be diligent in your gear research and become educated on your outdoor endeavors. Test all of your gear before your first trip. This guide is simply meant to provide guidance, and is not meant to replace critical thinking. Further, it is not meant to replace high quality gear, rather it's meant to enable people to get outdoors at lower cost. Educate yourself, make good decisions, and don't use gear outside of its intended use. Be responsible - I am not liable for your mistakes.
Disclosure: You might notice that I work with some mfgs to provide you with steeper discounts than retail, but I do not accept money from manufacturers for the purpose of shilling their products on this list. You're getting my actual thoughts and opinions and I won't hesitate to select another more suitable option. You will notice some affiliate links through AvantLink (an aggregator) and through Backcountry. As an Amazon Associate I earn from qualifying purchases.
Copyright © 2019 macon. All Rights Reserved
If you have any questions, feel free to reach out to me, my contact form can be found here.
Thanks for reading, I'm just glad you're here.
⠀
Now, let's get to the list!
⠀
Star Notation
(displayed next to item price)
- RED STAR = Critical Item / Necessity
- YELLOW STAR = Suggested Item / Depends on conditions
- GREEN STAR = Completely Optional - price not included on list
__
Total Price: Approx $590
__
.
-
-
THE BIG FOUR ($425)
Weight qty -
 UL 1P Tent
SMD Skyscape Scout (high quality)
36
oz1
UL 1P Tent
SMD Skyscape Scout (high quality)
36
oz1- oz
- lb
- g
- kg
-
 UL 40L Backpack
Montbell Versalite 40L Pack
17
oz1
UL 40L Backpack
Montbell Versalite 40L Pack
17
oz1- oz
- lb
- g
- kg
-
 UL 40F Down Quilt
HG Burrow 40 - use code MACON at checkout for 10% off their quilts!
15
oz1
UL 40F Down Quilt
HG Burrow 40 - use code MACON at checkout for 10% off their quilts!
15
oz1- oz
- lb
- g
- kg
-
 CCF Sleep Pad
Therm-A-Rest Z-Lite Sol SHORT (R~2.6)
10
oz1
CCF Sleep Pad
Therm-A-Rest Z-Lite Sol SHORT (R~2.6)
10
oz1- oz
- lb
- g
- kg
-
-
-
UTILITY ($85)
Weight qty -
 Pillow
Trekology Ultralight (optional)
2.75
oz1
Pillow
Trekology Ultralight (optional)
2.75
oz1- oz
- lb
- g
- kg
-
 Trekking poles
Cascade Mountain Tech (aluminum or carbon, pick your poison)
15.8
oz1
Trekking poles
Cascade Mountain Tech (aluminum or carbon, pick your poison)
15.8
oz1- oz
- lb
- g
- kg
-
 Headlamp
ENERGIZER LED Headlamp
2.2
oz1
Headlamp
ENERGIZER LED Headlamp
2.2
oz1- oz
- lb
- g
- kg
-
 Y Stakes
MSR Mini Groundhog (high quality)
0.35
oz5
Y Stakes
MSR Mini Groundhog (high quality)
0.35
oz5- oz
- lb
- g
- kg
-
 Lighter
Bic Mini Lighter
0.4
oz1
Lighter
Bic Mini Lighter
0.4
oz1- oz
- lb
- g
- kg
-
 Pack Liner
Fumigation Bag / Trash Compactor bag
1
oz1
Pack Liner
Fumigation Bag / Trash Compactor bag
1
oz1- oz
- lb
- g
- kg
-
 Food Storage / Stuff Sack
Gallon Ziploc bags
0.1
oz2
Food Storage / Stuff Sack
Gallon Ziploc bags
0.1
oz2- oz
- lb
- g
- kg
-
 Utility Knife
Victorinox Swiss Army Knife
0.74
oz1
Utility Knife
Victorinox Swiss Army Knife
0.74
oz1- oz
- lb
- g
- kg
-
 Trowel
Shaved down Coghlan's trowel
1
oz1
Trowel
Shaved down Coghlan's trowel
1
oz1- oz
- lb
- g
- kg
-
-
-
CLOTHING (from your closet)
Weight qty -
 Knit Hat / Beanie
generic, from your closet
3.5
oz1
Knit Hat / Beanie
generic, from your closet
3.5
oz1- oz
- lb
- g
- kg
-
 Bandana or Neck Gaiter
generic, from your closet
1
oz1
Bandana or Neck Gaiter
generic, from your closet
1
oz1- oz
- lb
- g
- kg
-
 Sunglasses
generic, from your closet
0.5
oz1
Sunglasses
generic, from your closet
0.5
oz1- oz
- lb
- g
- kg
-
 UL Down Jacket
500FP responsibly sourced down (check size chart!)
13
oz1
UL Down Jacket
500FP responsibly sourced down (check size chart!)
13
oz1- oz
- lb
- g
- kg
-
 UL Rain Jacket
Frogg Toggs (shell, layer w/mid to make toasty)
5.5
oz1
UL Rain Jacket
Frogg Toggs (shell, layer w/mid to make toasty)
5.5
oz1- oz
- lb
- g
- kg
-
 Long Sleeve Baselayer
generic synthetic, from your closet (sun protection)
6
oz1
Long Sleeve Baselayer
generic synthetic, from your closet (sun protection)
6
oz1- oz
- lb
- g
- kg
-
 Short Sleeve Baselayer
generic synthetic, from your closet
5
oz1
Short Sleeve Baselayer
generic synthetic, from your closet
5
oz1- oz
- lb
- g
- kg
-
 Athletic / River Shorts
generic synthetic, from your closet
6
oz1
Athletic / River Shorts
generic synthetic, from your closet
6
oz1- oz
- lb
- g
- kg
-
 Thermal Leggings
generic non-cotton, wool preferred
6
oz1
Thermal Leggings
generic non-cotton, wool preferred
6
oz1- oz
- lb
- g
- kg
-
 Underwear
generic non-cotton boxer briefs
2.5
oz2
Underwear
generic non-cotton boxer briefs
2.5
oz2- oz
- lb
- g
- kg
-
 Comfort Wool Socks
Merino Hiking Socks
2.5
oz2
Comfort Wool Socks
Merino Hiking Socks
2.5
oz2- oz
- lb
- g
- kg
-
 Hiking Shoes
Athletic shoes, from your closet
24
oz1
Hiking Shoes
Athletic shoes, from your closet
24
oz1- oz
- lb
- g
- kg
-
-
-
ISO FUEL COOK KIT ($25)
Weight qty -
 Stove (canister)
Soto Amicus (excellent in high wind, no windsceen needed)
2.9
oz1
Stove (canister)
Soto Amicus (excellent in high wind, no windsceen needed)
2.9
oz1- oz
- lb
- g
- kg
-
 Isobutane Fuel 4oz (100g)
MSR IsoPro or similar - should be (3.5" dia.) 4oz of fuel / 3.4oz can weight
3.5
oz1
Isobutane Fuel 4oz (100g)
MSR IsoPro or similar - should be (3.5" dia.) 4oz of fuel / 3.4oz can weight
3.5
oz1- oz
- lb
- g
- kg
-
Iso Fuel Canister
The fuel is consumable, so we have to account for the container
3.5
oz1
- oz
- lb
- g
- kg
-
 Cook Pot
IMUSA 0.7 QT -> Aluminum gets hot! Operate with bandana through handle
2.4
oz1
Cook Pot
IMUSA 0.7 QT -> Aluminum gets hot! Operate with bandana through handle
2.4
oz1- oz
- lb
- g
- kg
-
 DIY Beer Can Lid for pot
DIY (click link for video)
0.1
oz1
DIY Beer Can Lid for pot
DIY (click link for video)
0.1
oz1- oz
- lb
- g
- kg
-
 Plastic Spoon
Bamboo spoon, light, cheap, and reusable
0.2
oz1
Plastic Spoon
Bamboo spoon, light, cheap, and reusable
0.2
oz1- oz
- lb
- g
- kg
-
-
-
FOOD
Weight qty -
 --Food Options
Assortment of affordable dehydrated food, 2lbs
32
oz1
--Food Options
Assortment of affordable dehydrated food, 2lbs
32
oz1- oz
- lb
- g
- kg
-
-
-
WATER ($6)
Weight qty -
 Water Treatment
Potable Aqua Iodine Tablets - treats 25L
1
oz1
Water Treatment
Potable Aqua Iodine Tablets - treats 25L
1
oz1- oz
- lb
- g
- kg
-
 Water Bottles
2 x 1L Smart Water Botles
1.3
oz2
Water Bottles
2 x 1L Smart Water Botles
1.3
oz2- oz
- lb
- g
- kg
-
 --Water
Approx 2 L
67
oz1
--Water
Approx 2 L
67
oz1- oz
- lb
- g
- kg
-
-
-
EMERGENCY & HYGIENE
Weight qty -
 Med Kit
Meds 20xIBP, 15xByn, 10xTyl, 10xPepBis, 10xImod | Lotrimin | med tape | blisters | bandages | oinment - link is to an off the shelf option
2
oz1
Med Kit
Meds 20xIBP, 15xByn, 10xTyl, 10xPepBis, 10xImod | Lotrimin | med tape | blisters | bandages | oinment - link is to an off the shelf option
2
oz1- oz
- lb
- g
- kg
-
 Sanitizer
small container
1
oz1
Sanitizer
small container
1
oz1- oz
- lb
- g
- kg
-
 Toothbrush (chopped)
cut in half
0.3
oz1
Toothbrush (chopped)
cut in half
0.3
oz1- oz
- lb
- g
- kg
-
 Toothpaste
travel size, Dr Bronners is environmentally safe
1
oz1
Toothpaste
travel size, Dr Bronners is environmentally safe
1
oz1- oz
- lb
- g
- kg
-
 Sunscreen
small 1oz container
0.5
oz1
Sunscreen
small 1oz container
0.5
oz1- oz
- lb
- g
- kg
-
 Ear Plugs
I like these mack's, they're quite comfy
0
oz1
Ear Plugs
I like these mack's, they're quite comfy
0
oz1- oz
- lb
- g
- kg
-